

How to install Contactless Access CA-V2 devices on elevators and doors, and how people use them with the free CA Secure app.
1. The device
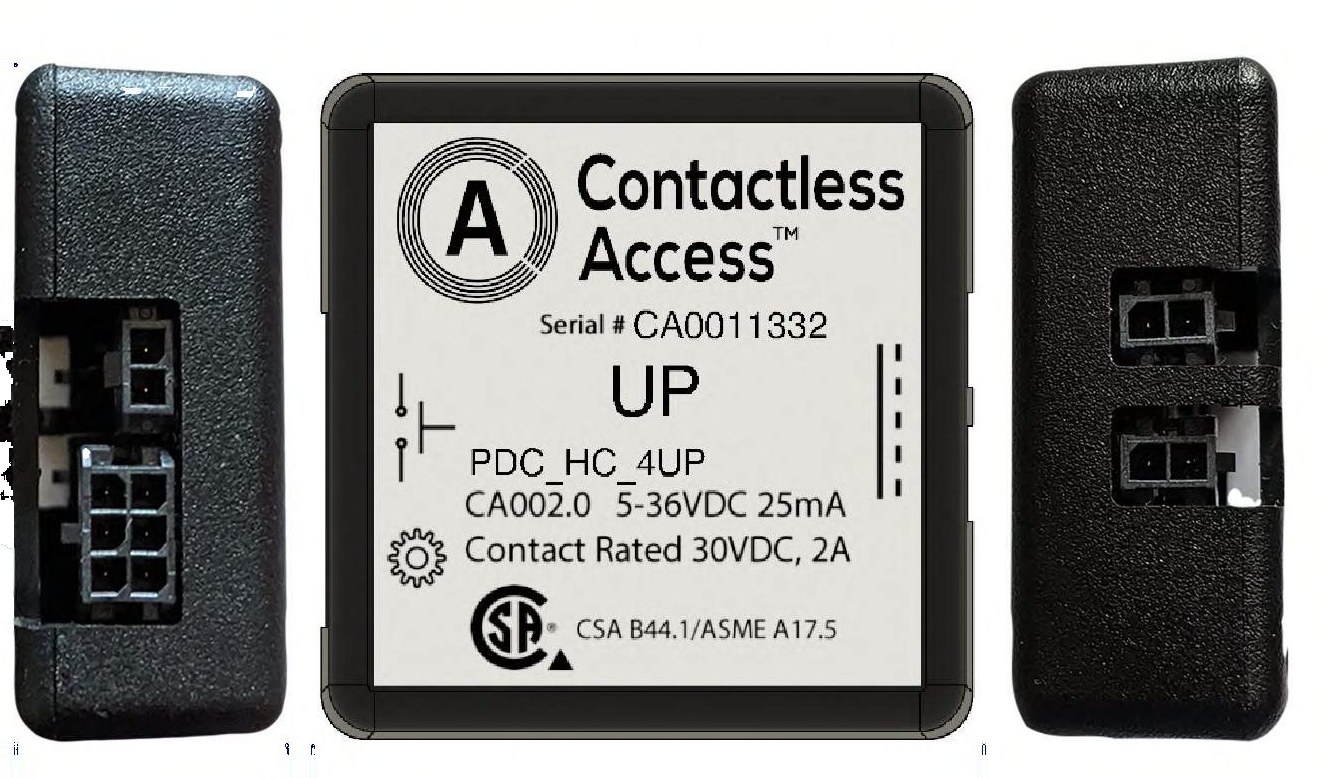
Each Contactless Access device connects to one existing button, such as an elevator call button, a floor button in the car or an accessible door opener. The phone talks to the device over Bluetooth, right at the button. The device needs no Wi-Fi or network connection, and the existing button keeps working as normal.
| Model | CA-V2 |
|---|---|
| Size | 50 × 50 × 20 mm (1.97 × 1.97 × 0.79 in) |
| Power | 5 to 36 VDC, 25 mA |
| Relay contact | Rated 30 VDC, 2 A |
| Connections | 4: relay (2) and power (2) |
| Daisy chain | Up to 15 devices from one power supply |
| Radio | Bluetooth Low Energy, local only |
| Standards | CSA B44.1/ASME A17.5 |
2. Installation
Installing a device means mounting it and making four connections: the two relay wires, power (5 to 36 VDC) and ground. Installation should be done by a qualified elevator or door technician.
Mounting the device
Measure the car button panel and choose a suitable place for the device. Make sure the surface is free of oil and dust. Peel the protective plastic off the adhesive hook-and-loop pad and press the device firmly into place for 15 seconds.
Connections
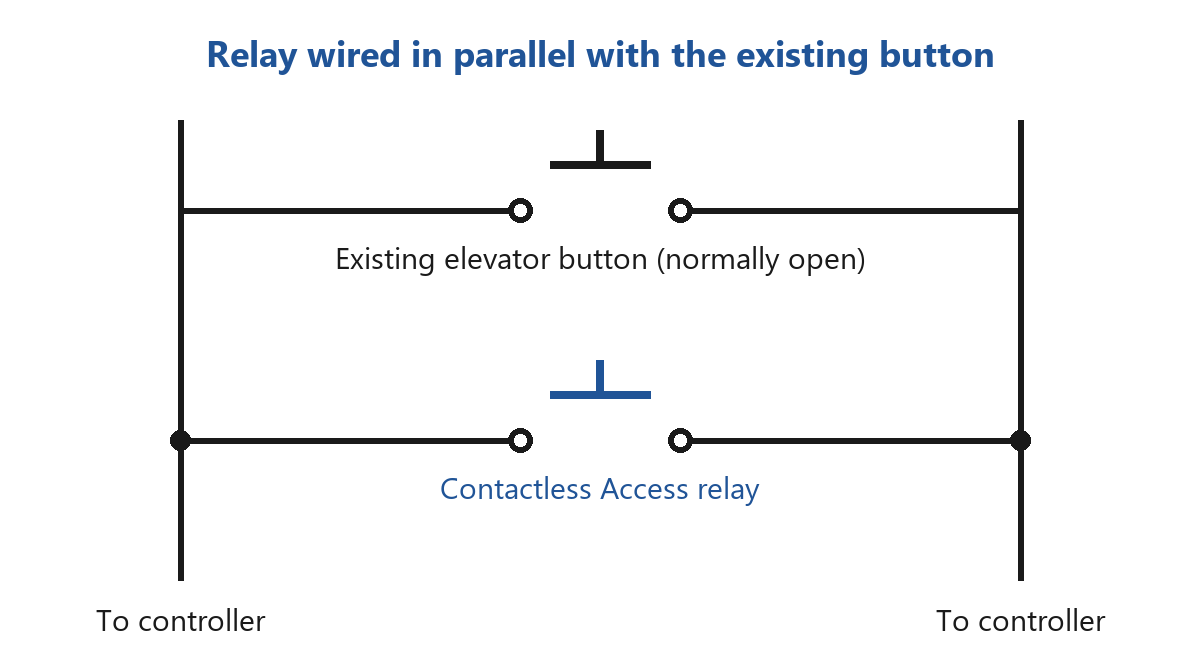
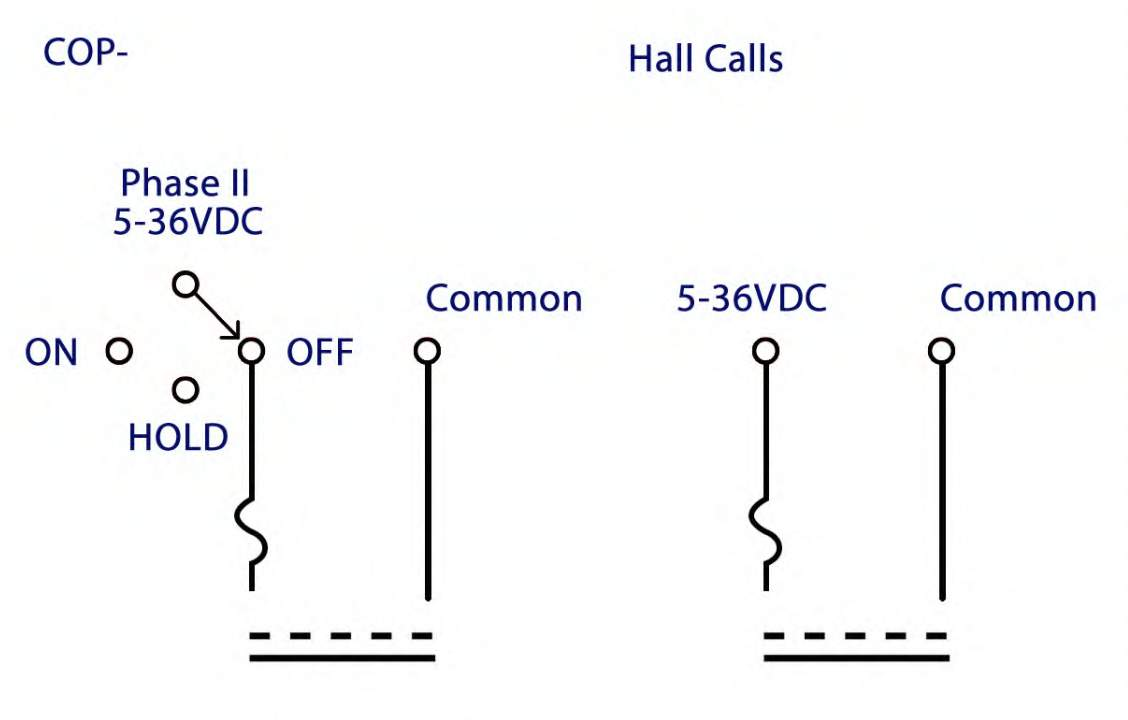
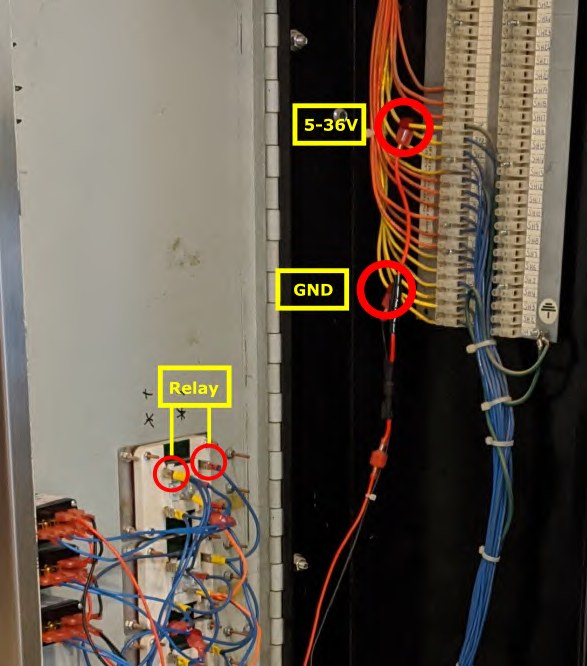
Use the elevator control panel schematics to find voltage and ground, and check both with a multimeter before you start. Use the Contactless Access power and relay connector wires provided. Connect them with the 18–22 AWG male disconnects and T-tap splices provided or, if there is room, into the car’s terminal block.
- Relay: connect the relay wires in parallel with the normally open contacts of the elevator’s push button.
- Power: connect the red wire to a positive 5 to 36 VDC source and the black wire to its negative return. Plug the 2 ft (60 cm) power cable into the device.
- More devices: power the next devices with the plug-in daisy-chain cables, up to 15 devices on one supply.
Notes
- On the car operating panel (COP), fire service Phase II needs a relay that disconnects power to the Contactless Access devices.
- Up to 15 devices can be daisy-chained together.
Watch the device installation video on YouTube
3. Setting up devices
Every device is tested in production and recorded against the building, car, floor or door it is made for. After installation, Contactless Access technicians use the CA Utility app to check that each device answers and presses its button, and to set its Bluetooth range. The building then appears in CA Secure with its own name and logo.
If you install devices yourself, contact us and we will help you set them up.
4. Using the CA Secure app
CA Secure is free for iPhone and Android, with no account, no ads and no tracking. Get it from Google Play or the App Store, or scan the code.


Step-by-step help for every feature is at casecure.info/help.

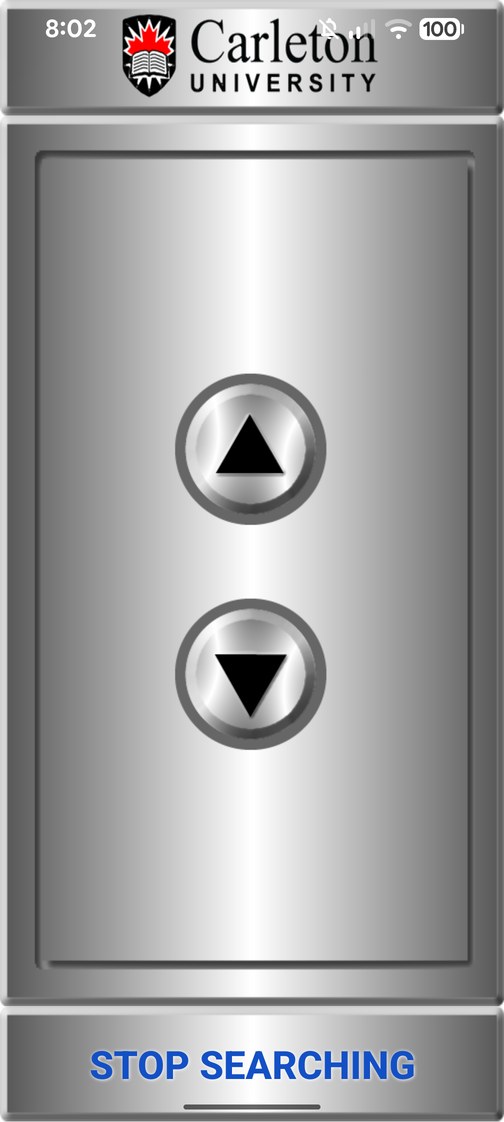
Call the elevator
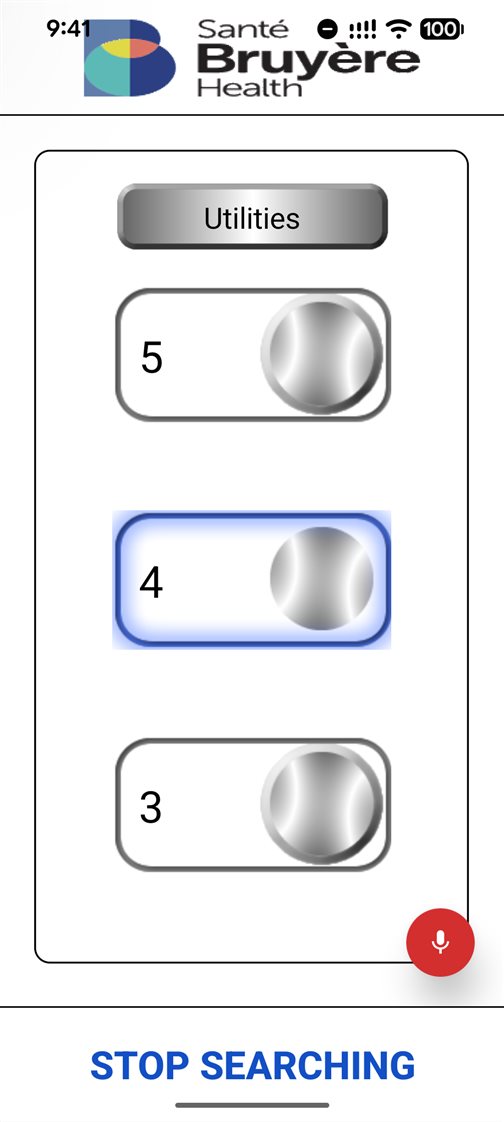
Open CA Secure near a Contactless Access building. Its doors and elevators appear as large buttons, under the building’s own logo. Tap up or down and wait for the elevator.
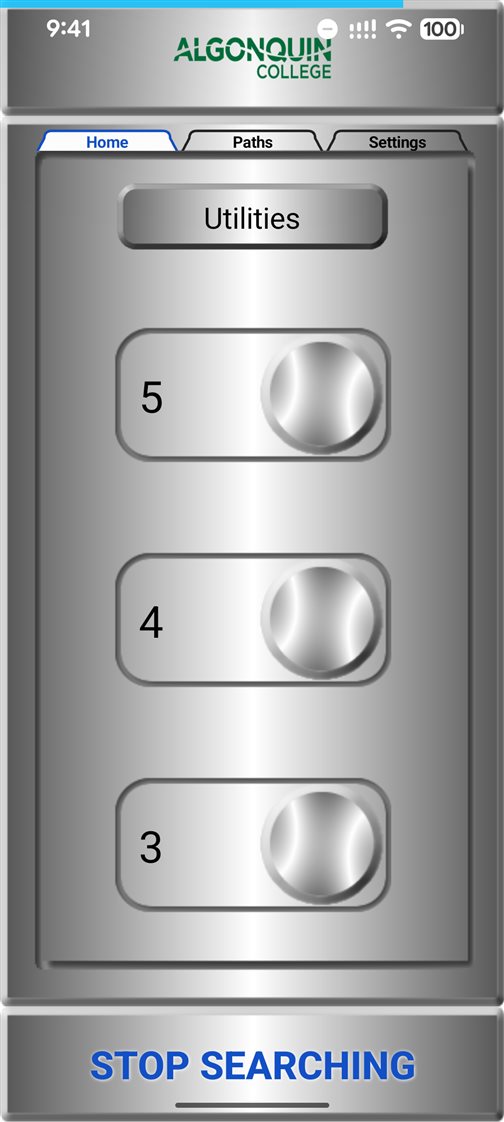
Choose your floor
Inside the elevator, the floor buttons appear. Tap your floor.
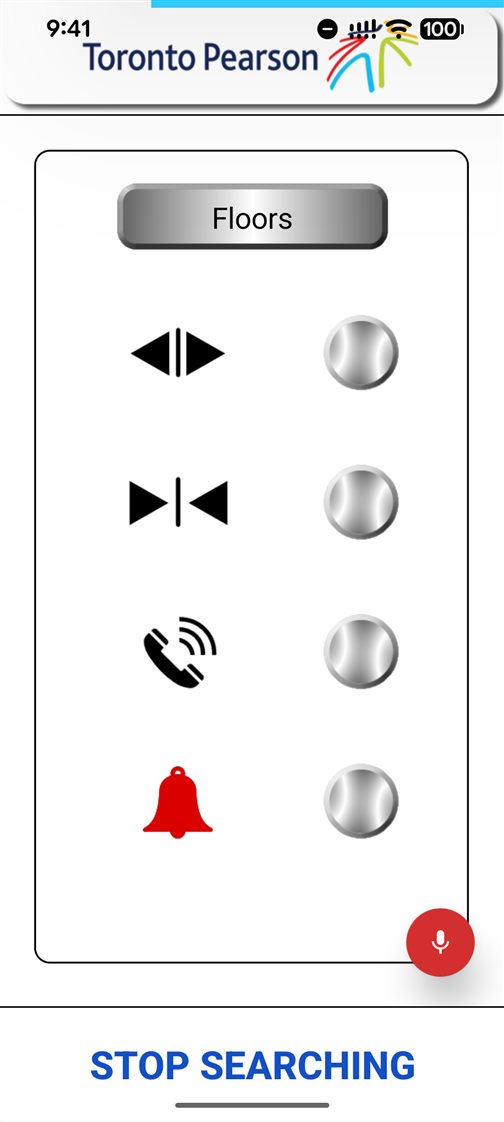
Door, phone and alarm
Use door open, door close, the emergency phone and the alarm from the same screen.
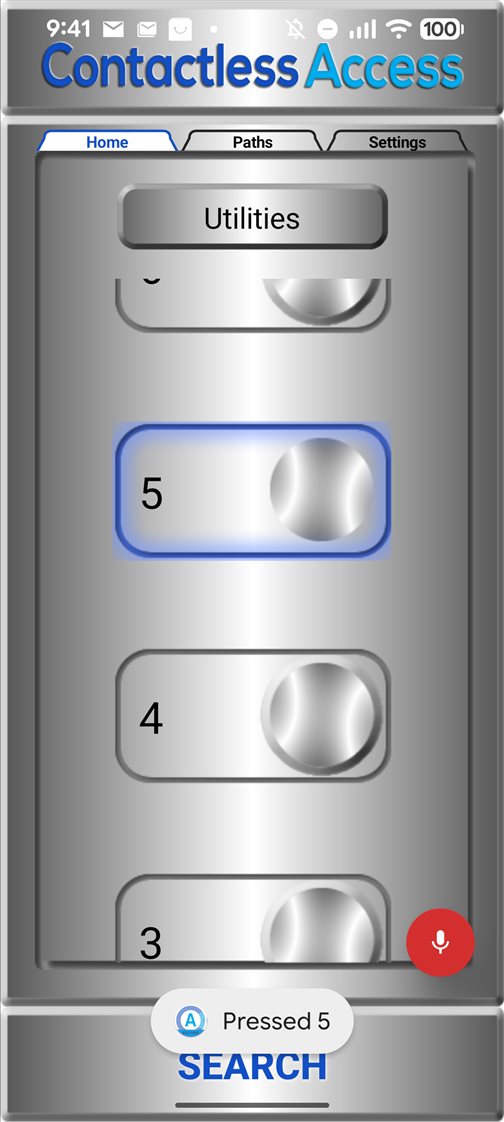
Say “OK CA”
Turn on Voice control, say “OK CA”, then a floor number, a door, a path, up or down. Your phone’s own speech recognition does the listening, and what you say is never logged.
Paths
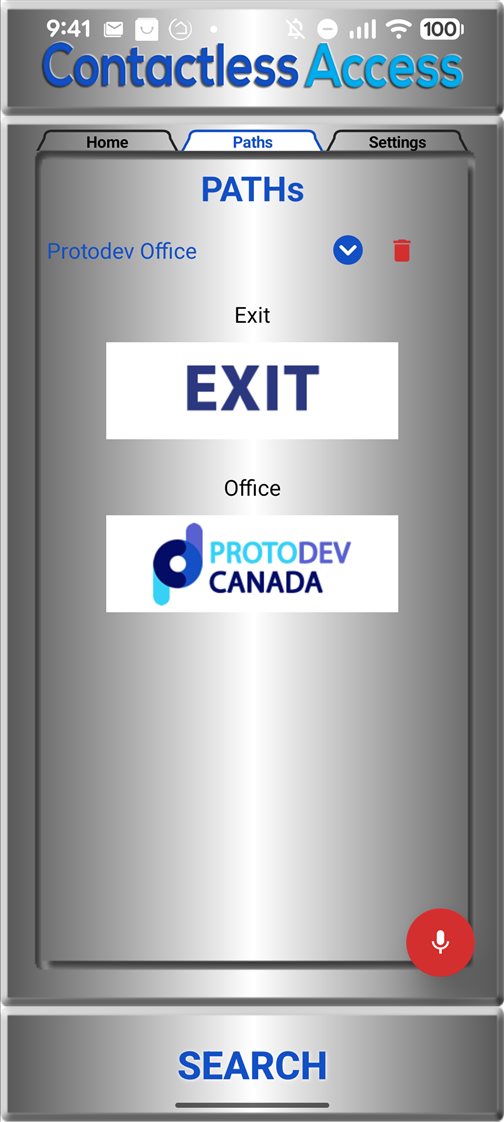
A path opens a series of doors and elevators in order, from the entrance to your apartment or office, with one tap. Start one from the app, a home-screen widget or your voice, or let it run as you arrive.
Secure doors
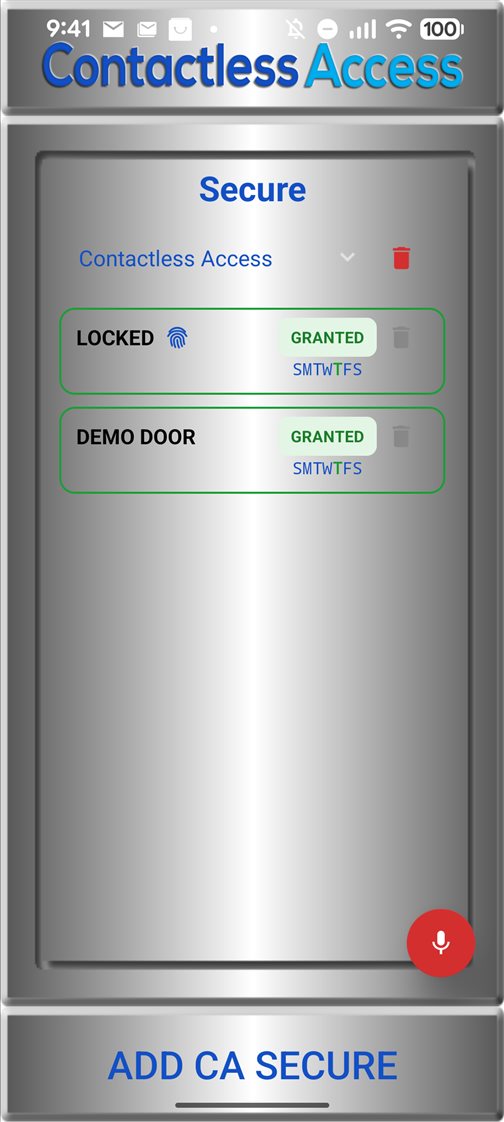
Some doors only open for approved people. Access arrives by email link or QR code, with no account or password, and works at the door even without internet.
Make it yours
High contrast, your phone’s text size up to 200%, screen tabs, sideways use in a holder, and English, French or Spanish. Every screen works with VoiceOver and TalkBack.
5. Certifications and declarations
5–36 VDC, 25 mA. CSA B44.1/ASME A17.5 certified.
Contains FCC ID: 2AC7Z-ESP32WROOM32U
This device complies with part 15 of the FCC Rules. Operation is subject to the following two conditions: (1) This device may not cause harmful interference, and (2) this device must accept any interference received, including interference that may cause undesired operation.
FCC compliance statement
CAUTION: The manufacturer is not responsible for any changes or modifications not expressly approved by the party responsible for compliance. Such modifications could void the user’s authority to operate the equipment.
NOTE: This equipment has been tested and found to comply with the limits for a Class A digital device, pursuant to part 15 of the FCC Rules. These limits are designed to provide reasonable protection against harmful interference when the equipment is operated in a commercial environment. This equipment generates, uses, and can radiate radio frequency energy and, if not installed and used in accordance with the instruction manual, may cause harmful interference to radio communications. Operation of this equipment in a residential area is likely to cause harmful interference in which case the user will be required to correct the interference at his own expense.
ISED compliance statement
This Class A digital apparatus complies with Canadian ICES-003.
Cet appareil numérique de la classe [A] est conforme à la norme NMB-003 du Canada.
CAN ICES-003 (A)/NMB-003(A)
Supplier’s Declaration of Conformity
47 CFR § 2.1077 Compliance Information
Product name: Contactless Access
Product model: CA-V2
Manufacturer: ProtoDev Canada, 304-376 Churchill Avenue North, Ottawa, Ontario K1Z 5C3, Canada. info@protodevcanada.com, www.protodevcanada.com
Modular components used: Wi-Fi and Bluetooth Internet of Things module, model ESP32-WROOM-32D, FCC ID: 2AC7Z-ESP32WROOM32U.
This device complies with part 15 of the FCC Rules. Operation is subject to the following two conditions: (1) This device may not cause harmful interference, and (2) this device must accept any interference received, including interference that may cause undesired operation.
The certificates and test reports are on the Documentation and certifications page.
6. Warranty
ProtoDev Canada hereby guarantees and warrants function and finishing of all products under normal installation and usage for a period of 1 (one) year from the date of purchase. ProtoDev Canada will replace any defective product at no additional charge to the product owner.
ProtoDev Canada’s sole obligation and liability under the Warranty shall be limited to the replacement, the repair or the refund of the original purchase price, at ProtoDev Canada’s sole discretion, of any defective Products which are proven not to conform to the Products’ specification and which are returned to the factory or service center designated by ProtoDev Canada during the Warranty Period by the Customer after completing a Warranty Claim. All provided that written notice of such defect is given by the Customer to ProtoDev Canada within 21 days after discovery thereof. Freight cost to such factory or service center will be paid by the customer and freight cost from such factory or service center to Customer will be paid by ProtoDev Canada.
ProtoDev Canada will not be responsible for and will have no obligation under the Warranty to any non-conformity of the Products, caused, in whole or in part, as a result of misuse, abuse, tampering with or modification of any of the Products and/or by accidents, fault or negligence, improper administration, application and/or use, installation, service, repair and/or maintenance of the relevant Products, by act of vandalism or by any causes whatsoever (including but not limited to environmental conditions) that are external thereto.
Please retain a copy of your dated Purchase Order for this product in order to submit a warranty claim.
To file a warranty claim, please take photographs showing the damage to your Contactless Access product from various angles, for us to conduct a proper assessment of your warranty claim. Please write a brief description explaining how the damage occurred to the product, along with your phone number and complete shipping address. Include the damaged Contactless Access module, a copy of your dated Purchase Order, and mail to this address:
ProtoDev Canada
304-376 Churchill Avenue North
Ottawa ON, Canada K1Z 5C3
To send a claim by email, contact us at info@protodevcanada.com. Please write your claim summary in the body of the email and attach digital photographs and a scanned image of your dated Purchase Order.
Questions? Call 1-844-301-9739 or send us a message.